
Crawl Space Inspection Checklist for Homeowners
A useful crawl space inspection checklist records water, ground cover, framing, insulation, equipment and access conditions, with dated photos and a next step for each concern. Homeowners can start outside and at a safe access opening. Leave crawl-space entry and inaccessible areas to a qualified professional. The goal is a repeatable record that helps explain what changed and supports a well-defined repair plan.
Last reviewed: October 3, 2026. Access-limitation guidance added October 9, 2026.
Quick links: Inspection record · Checklist · Professional report · Incomplete inspection · FAQs
Safety comes before the checklist
Stay out if you see standing water, exposed wiring, suspected sewage, unstable supports, animals or an opening that cannot be approached safely. Do not crawl farther to improve a photograph, lift insulation, probe wood, open electrical covers or move unfamiliar materials. A flashlight and camera do not establish that a space is safe.
For a suspected gas leak, leave the area and contact the gas utility or emergency services from a safe location. Avoid operating switches or anything that could spark. For water near electrical equipment, keep away and arrange professional assessment. CDC flood-safety guidance specifically warns against operating electrical equipment or switching power while standing in water.
Active leaking, possible sewage and visibly displaced structural supports need prompt attention. Immediate danger takes priority over documenting damage or collecting quotes.
Crawl space inspection checklist: five report fields
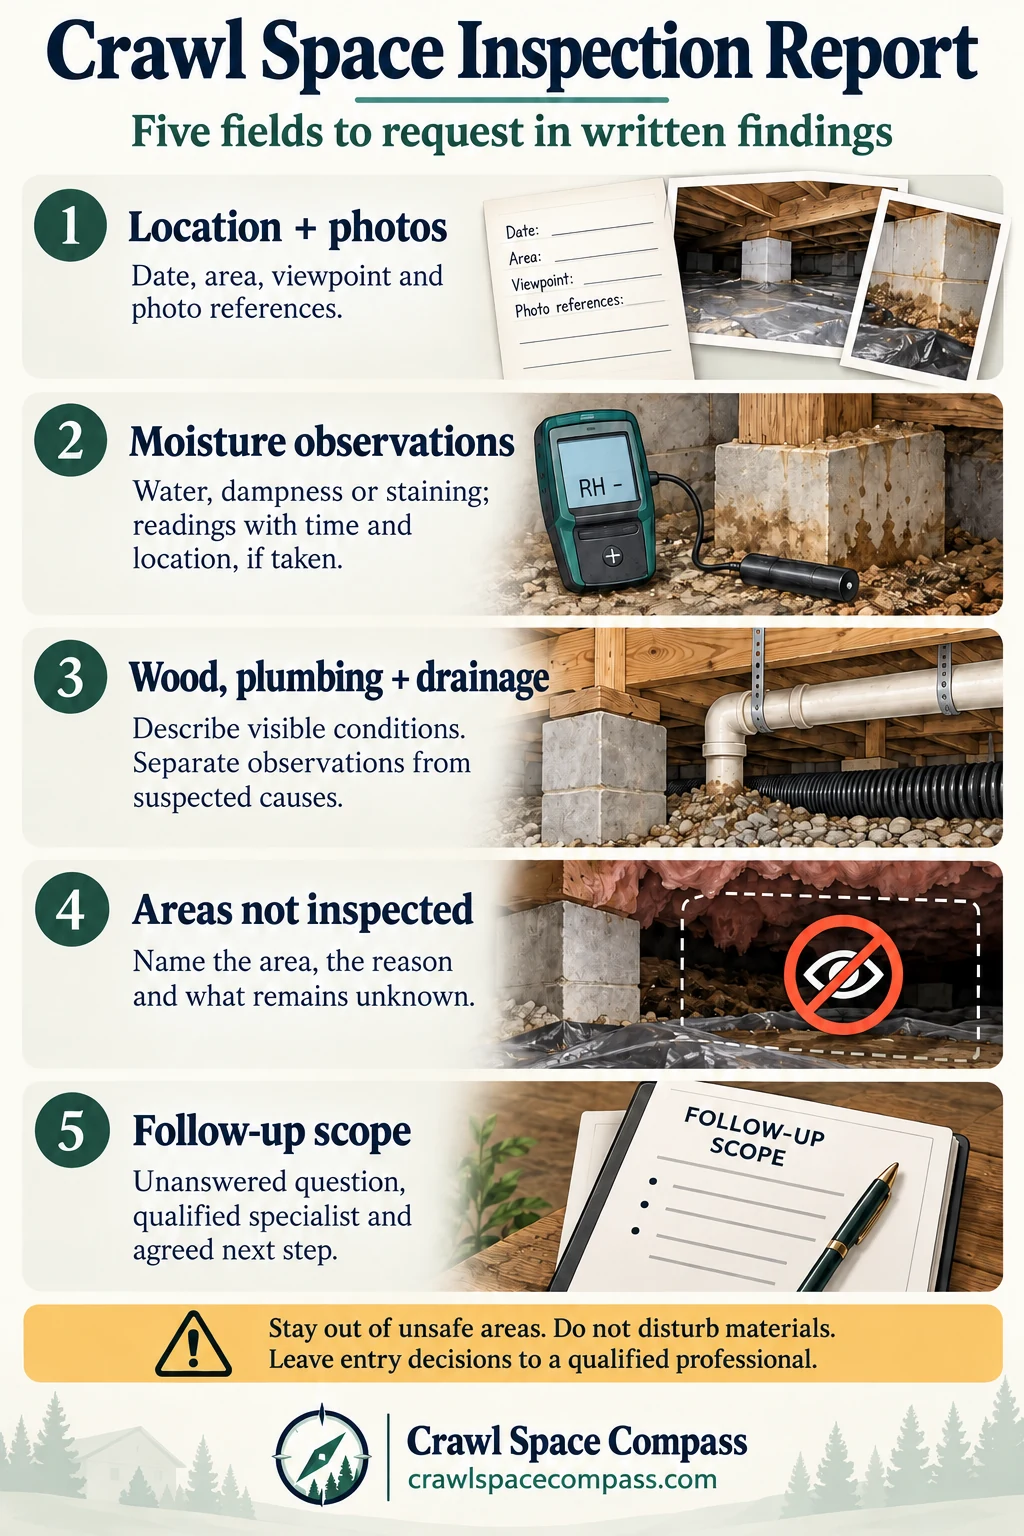
Use this visual to review written findings with your inspector. It summarizes evidence to request; inspection contracts and safe access determine what can be assessed.
Inspection report graphic, in text
Crawl Space Inspection Report. Five fields to request in written findings:
- Location + photos: Date, area, viewpoint and photo references.
- Moisture observations: Water, dampness or staining; readings with time and location, if taken.
- Wood, plumbing + drainage: Describe visible conditions. Separate observations from suspected causes.
- Areas not inspected: Name the area, the reason and what remains unknown.
- Follow-up scope: Unanswered question, qualified specialist and agreed next step.
Safety: Stay out of unsafe areas. Do not disturb materials. Leave entry decisions to a qualified professional.
The blank note and sensor are illustrative, with no actual property readings. Crawl Space Compass created this report-review aid from the source-backed guidance below; it is not a required inspection standard. Review the professional-report details and follow-up process for areas not inspected.
Start one inspection record and reuse it
Copy these fields into a notebook or phone note. Make a separate entry for each location, using the same location names on future visits:
- Date and time: when the observation was made.
- Weather: recent rain, dry spell or storm; note when rain ended if known.
- Location and viewpoint: for example, “rear wall, viewed from access door.”
- Condition: describe what is visible without assigning a cause.
- Photos: one wider context image and one closer image, only when safely obtainable.
- Readings: temperature and relative humidity from an existing accessible sensor, including its location.
- Next step: monitor, arrange a specific trade assessment or request urgent help.
- Follow-up: responsible person, planned date and result.
Example: “October 3, morning after rain; rear access; wet patch beside liner edge; photos 04–05; source unknown; ask inspector to compare exterior drainage with this location.” Mark hidden or inaccessible areas “not observed,” rather than “clear.”
Exterior checklist: follow possible water paths
Walk around the house from safe ground. Note overflowing or disconnected gutters, downspout outlets near the foundation, depressions holding water, irrigation directed at the house and runoff approaching the access opening. Include nearby patios or walkways where water collects. Do not climb onto the roof or enter floodwater.
Record where water starts and where it appears to travel. A puddle beside a wall suggests a drainage question; it does not establish how water entered below. The University of Georgia moisture checklist identifies gutters, downspouts, grading and irrigation as useful exterior checks.
Crawl space checklist: observe, document, refer
Use the following from a safe viewpoint. Ask the professional to complete items you cannot see.
- Access and openings: Photograph the door condition, gaps, blocked access and visible vent damage. Record the existing setup; do not change vents or seals during the inspection.
- Water and staining: Note puddles, damp soil, waterlines, deposits on masonry and wet patches above or below the liner. Compare locations with exterior photographs. A stain may document an earlier event; it does not prove an active leak.
- Ground liner: Record exposed soil, tears, separated seams, loose edges and water collecting on top. Ground cover helps limit soil moisture entering the building, as NC State Extension explains. Its appearance alone cannot confirm drainage performance or a complete encapsulation system.
- Insulation and ducts: Note hanging or missing insulation, visible wetness, disconnected duct sections and damaged outer duct covering. Ask an HVAC professional to distinguish condensation, duct problems and nearby leaks. Do not pull materials aside to inspect hidden surfaces.
- Plumbing and drains: Record visible dripping, staining beneath joints and disconnected drain lines. The location of a wet patch helps a plumber investigate but may not identify its source. Do not handle suspected sewage or test unknown valves.
- Electrical and equipment: From a distance, note damaged-looking wiring, open boxes, equipment alarms and water near connections. Have an electrician assess electrical concerns. Record sump and dehumidifier model information only if safely visible; leave functional testing to the appropriate professional.
- Wood and supports: Record visible sagging, split members, deteriorated areas or supports that appear displaced. Avoid declaring the structure safe or failed from a photograph. Ask whether a structural specialist needs to evaluate the finding before crawl space repairs are specified.
- Pests and possible growth: Photograph visible droppings, insect activity, tube-like material or unusual surface growth without disturbing it. Ask a pest professional to identify suspected termite evidence. EPA notes that termite and ant swarms can be confused. Do not identify growth or assess health risk from a photograph.
Keep observations separate from explanations: “droplets on duct exterior” is an observation; “the duct is leaking” needs investigation. Several causes can occur together.
What a useful professional report should include
Before booking, ask what the inspection covers and whether you will receive written findings. Request:
- An access map, photographs and a list of areas not reached or concealed.
- Observed conditions separated from suspected causes and confirmed findings.
- Humidity, temperature and wood-moisture readings where relevant, with locations and measurement methods.
- Urgent precautions, further specialist checks and recommended repair sequence.
- The evidence for each proposed repair, plus a way to check the result.
A visual inspection is a snapshot. It cannot establish what happened in every season, reveal all concealed damage or replace specialist electrical, structural or pest evaluation. A dry visit does not rule out rain-related entry.
If sealing is proposed, ask how existing drainage and moisture problems will be addressed first. PNNL's water-management guidance places those issues ahead of enclosing and insulating the space. Review what crawl space encapsulation includes before comparing packages.
If part of the crawl space was not inspected
Before comparing repair proposals, turn each important access limitation into a specific follow-up question. An inspection report records what was examined and what remains unknown; a repair proposal defines work offered for a price. A proposal should identify any assumptions it makes about areas the contractor has not evaluated.
The ASHI Standard of Practice calls for reporting covered components that were not inspected and why, and describing crawl-space inspection methods. It does not require repair designs or cost estimates. InterNACHI's standard also excludes unsafe or inaccessible entry and moving stored items or debris. These are professional standards, not a statement that every inspection has identical terms.
Agree on a follow-up scope record
- Location and limit: Name the area or component, what prevented inspection, and what was visible. Distinguish an unreached section from a concealed surface.
- Decision affected: Ask which proposed work could change when that area is evaluated. Record the unanswered question rather than assuming hidden damage or a clear result.
- Person, method and preparation: Identify the appropriate inspector or specialist, the assessment needed, and who will arrange safe access preparation with the property owner's permission. Do not enter, dismantle materials or lift insulation yourself to complete the record.
- Return visit: Agree on its price, included areas, measurements or testing, written findings and photographs, and remaining exclusions. Clarify whether it covers previously inaccessible conditions, verification of repairs, or both.
Hypothetical record: “Rear floor framing beyond the duct was not reached; its condition remains unknown. Ask whether this gap affects the proposed framing-repair scope. A qualified professional will determine safe access and the assessment method. Before booking, confirm access preparation, the return fee, photographs, written findings and any still-concealed areas.”
If electrical hazards prevent inspection, arrange qualified assessment before another entry attempt. PNNL's pre-retrofit guidance recommends postponing interior inspection where faulty wiring presents a shock risk. After follow-up, date the new findings and keep any unanswered questions attached to the proposals.
Turn findings into a follow-up plan
Give each contractor the same dated record and use it to compare crawl space quotes. Ask which findings each line item addresses, what remains excluded and who will verify completion. Before work begins, confirm permit responsibility, warranty terms and exclusions in writing. For local options, start with the directories for North Carolina, South Carolina or Georgia.
After work, request completion photos from the same locations, relevant equipment-test results, maintenance instructions and any agreed moisture readings. Recheck the original symptom after comparable rain or weather. A neat liner installation alone does not show that the water source was corrected.
Plan a routine review at least annually and after a new leak, unusual odor or significant storm, using a professional wherever entry is needed. PNNL recommends annual crawl-space checks. Follow equipment-specific service instructions between inspections.
Frequently asked questions
Can I inspect my crawl space without entering it?
Yes. Exterior drainage photos, safe access views, existing sensor records and notes about odors or leaks can help. Have a professional inspect the remaining areas and identify the limits of your record.
Should I check immediately after rain?
Post-rain observations can reveal temporary water paths. Wait until the weather and exterior access are safe, and stay out of standing water. Ask a professional to document interior conditions.
What humidity reading should I record?
Record actual relative humidity, temperature, time and sensor location. Several readings across different weather conditions are more informative than one number. Ask the inspector to interpret the pattern alongside material moisture and visible conditions.
What if insulation is wet or there is visible growth?
Document it without disturbing it and arrange assessment of the moisture source and affected material. EPA emphasizes fixing water problems alongside mold cleanup. Replacing insulation alone may leave the cause unresolved.
Does a clean-looking crawl space mean repairs are complete?
No. Match the finished work to the agreed scope, confirm appropriate equipment testing and compare follow-up conditions with the original record. Keep unresolved concerns open until the responsible professional explains the evidence and next step.